How to install Windows on Linux server natively
In this tutorial, I’ll show you how to install Windows Server on a VPS natively (without the need for virtualization software like VBOX, VMware…)
Requirements:
- At least 2 machines (1 for sharing the setup data via Samba/Network Share, the other for installation)
- Networking access between 2 machines
- VNC/KVM/IPMI access of the target machine which will handle the installation, UART/Serial console access only will not work
- The targeted installation machine must either be VPS using full virtualization (KVM/QEMU/VMware/VBOX) or is a dedicated server running on barebone hardware, OpenVZ or any kind of kernel virtualization or container is not supported.
- root access of the Linux server
Note:
- This tutorial might not always be working if the virtualization/hardware of the targeted machine is using some weird driver/non-standard hardware configuration.
- I’ll also show you how to integrate VirtIO driver into Windows installation image for it to recognize network driver because Windows doesn’t have the driver for VirtIO built-in.
- Some VPS providers set Static IP for their clients, make sure you’ve written down the current IP configuration on the Linux server that you’re going to install Windows on it, just in case!
1. Integrating VirtIO driver into Windows ISO
Why we have to do this? Because on some common virtualization software which some VPS providers use, they use a specialized driver for their virtual devices and these devices doesn’t have driver pre-installed in Windows, the results could be somewhere from non-working network card to unbootable because of lacking disk driver
You could download the latest VirtIO driver for the most variant of Windows HERE, chose the latest version, download the ISO file and extract it to get the driver files.
If you know that the devices on the targeted machine use don’t need a specialized driver or you’re trying to install on a dedicated/bare-metal server, you could skip this step.
You could do this with DISM and tons of command line… but to simplify the procedure I would recommend you to use NTLite. Here I’m using NTLite v1.7.1.6572 which is the latest version when this post is created.
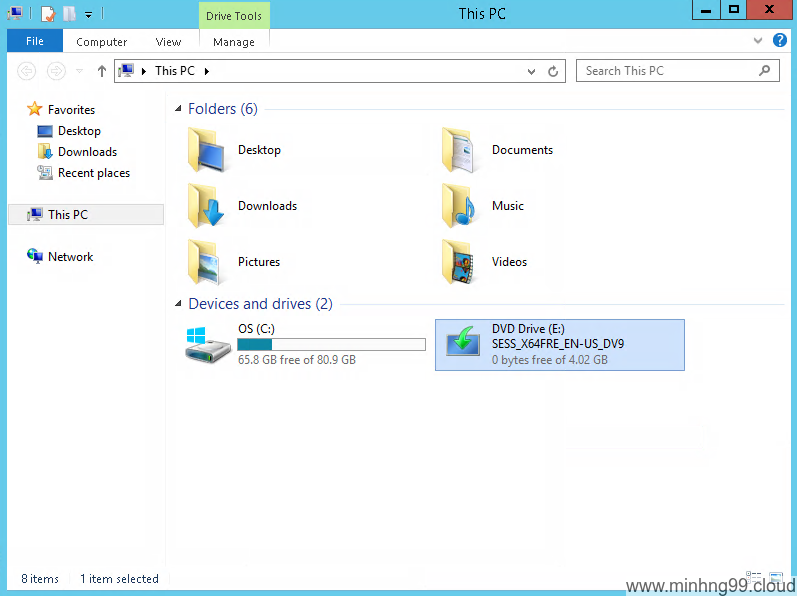
You’ll need a Windows setup ISO, here I’m using Windows Server 2019 evaluation downloaded from Microsoft’s website, after downloaded it you’ll need to extract the content from it, you could use 7-Zip or some other ISO extract tools but here I’m just using Windows to mount it and then copy it out.
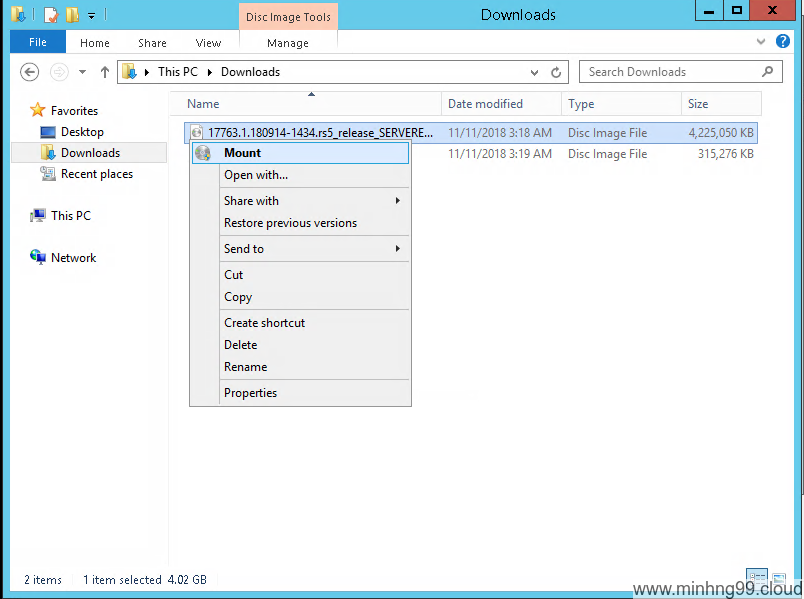
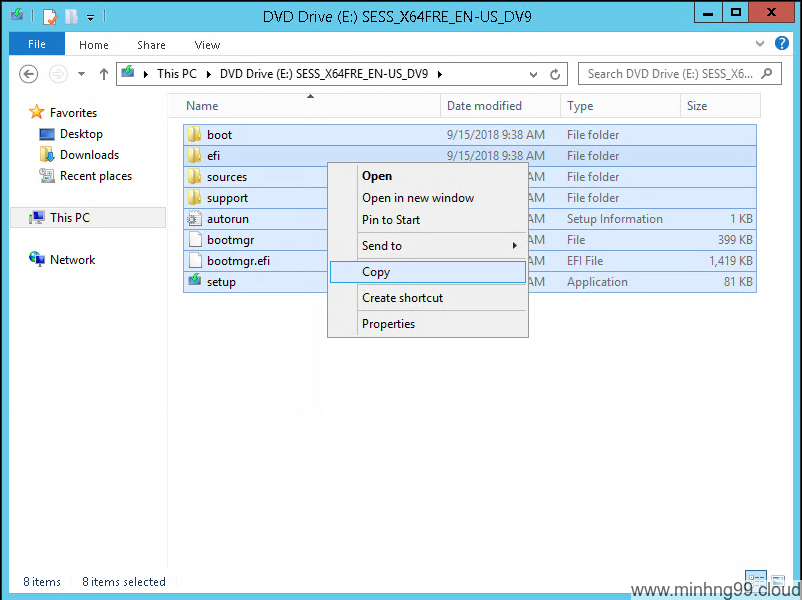
Why do I have to copy it out? Because NTLite (or Windows’s DISM) does not want to work with a read-only .wim file so you’ll have to copy it out somewhere writable.
Now we will have to load it to NTLite for adding drivers into it.

Starting off by click Add and then Image directory
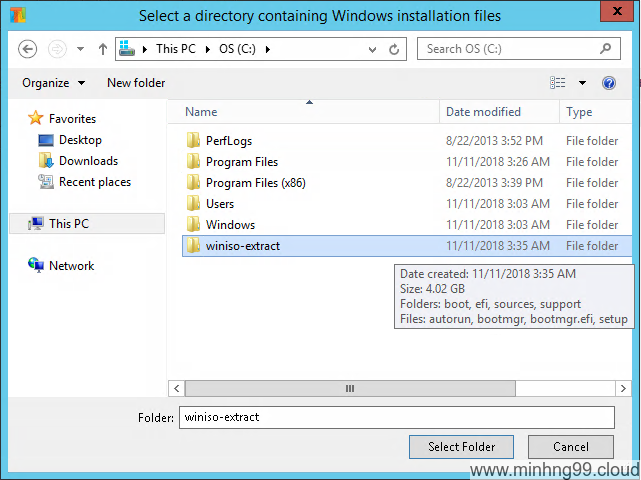
Here choose the directory of the extracted content from the ISO file, I’ve copied the contents to C:\winiso-extract.
Do not select the mounted, read-only drive
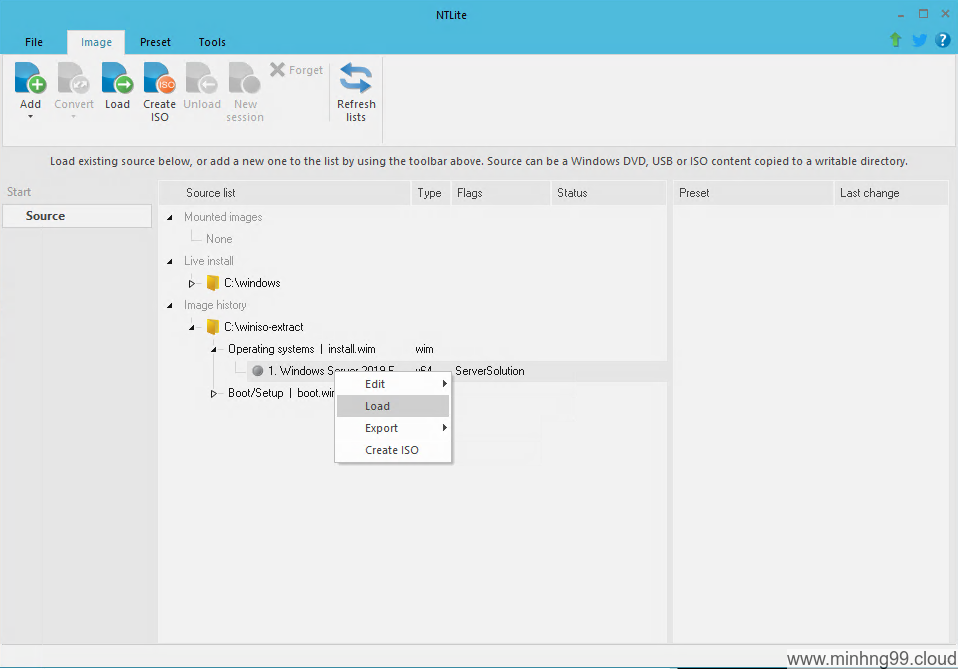
NTLite will show how many variants of the OS is available inside the ISO files, there could be multiple selections here like for Pro/Core Installation/Datacenter… Select the one that you’re going to install, if you install the driver into the wrong version which you will not use for the actual setup then you’ll NOT get the driver that you’ve integrated or you could integrate the driver for every variant of it… but it will need some time to do so, here my ISO only have Essential so I’ll just go with it
Right-click into the variant you want to integrate driver under Operating systems | install.wim and select Load
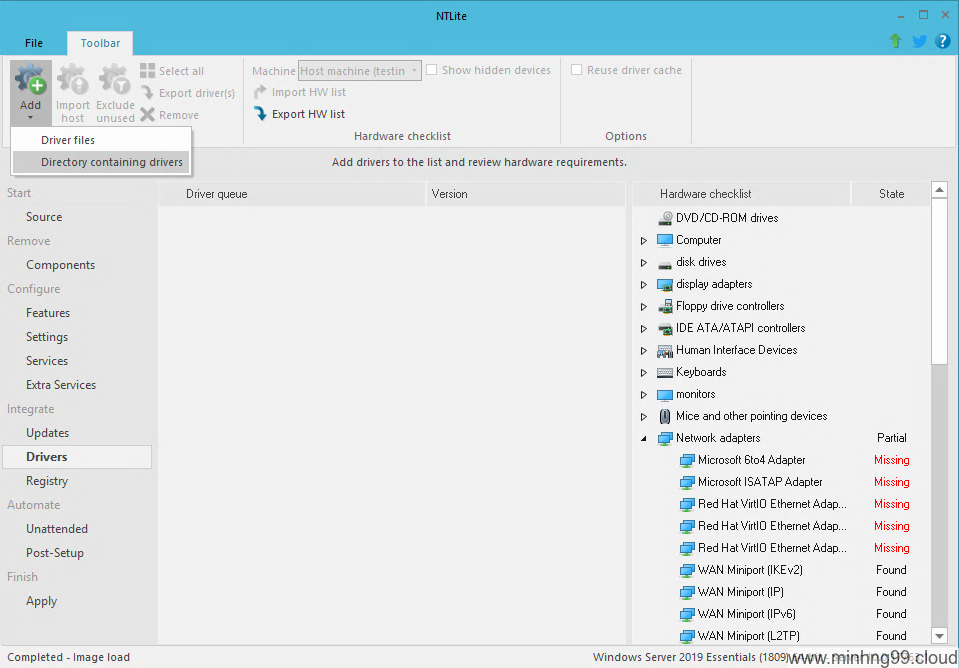
After some time of waiting, the long menu on the left side will appear, now select Drivers, Add, Directory containing drivers
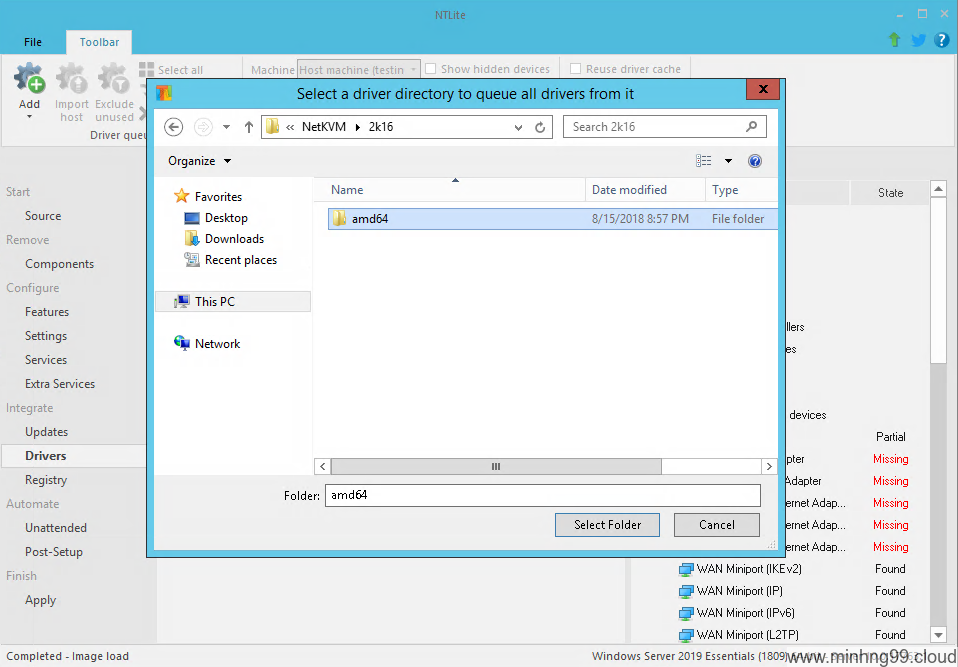
Now you have to select the appropriate driver for your OS version and architecture, select the wrong one could bring disaster so make sure it’s the right one.
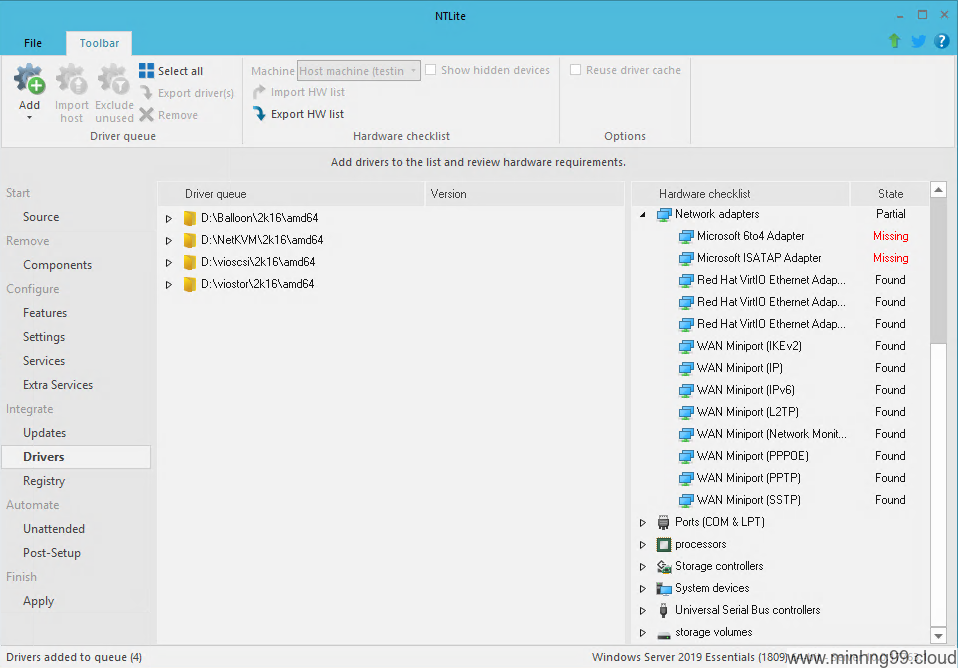
The driver folder which you select should’ve looked something like this inside:

For Windows to work on VirtIO virtualized properly, you have to have at least these 4 driver in it (Baloon, NetKVM, VioSCSI, VIOStor), NetKVM is the important bit because you will be able to download those drivers later but without internet access on your targetted machine after install has finished then you have no way to download anything.
I’ll just be going to add as below…
Now select the Apply on the left side, chose the option as you want in the middle, you could skip the Create ISO if you’re gonna to create a shared directory right after this… But it’s nice to have the ISO image for backing up somewhere so you don’t have to do this again.
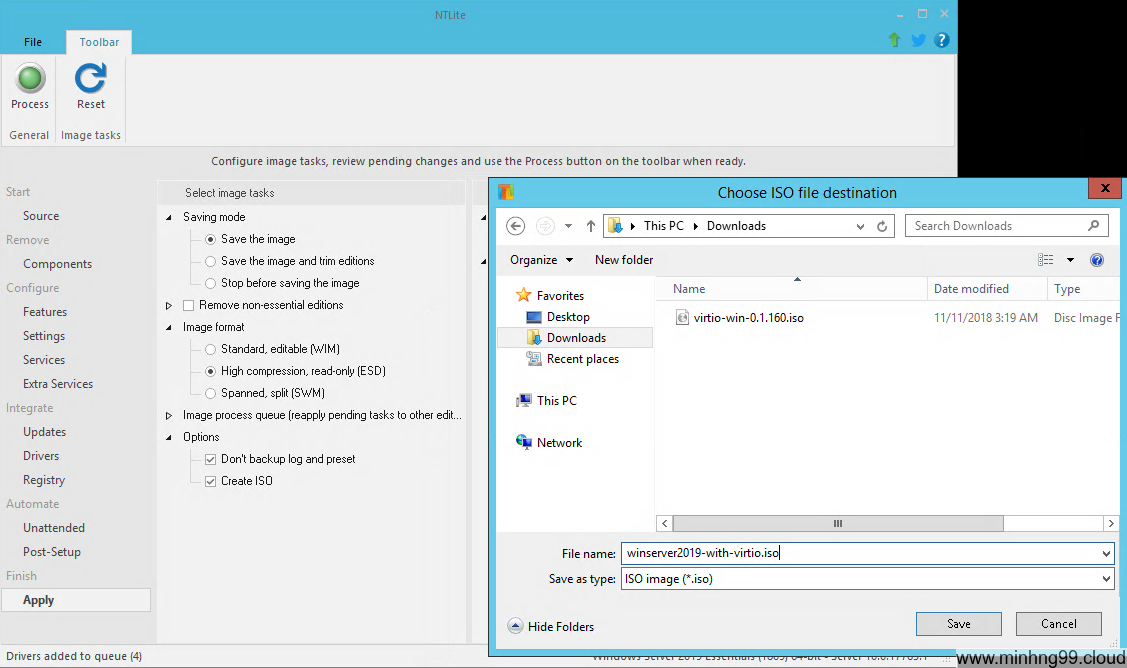
After you’ve done fiddling around, press the green Process button on the top left corner for NTLite to do its job.
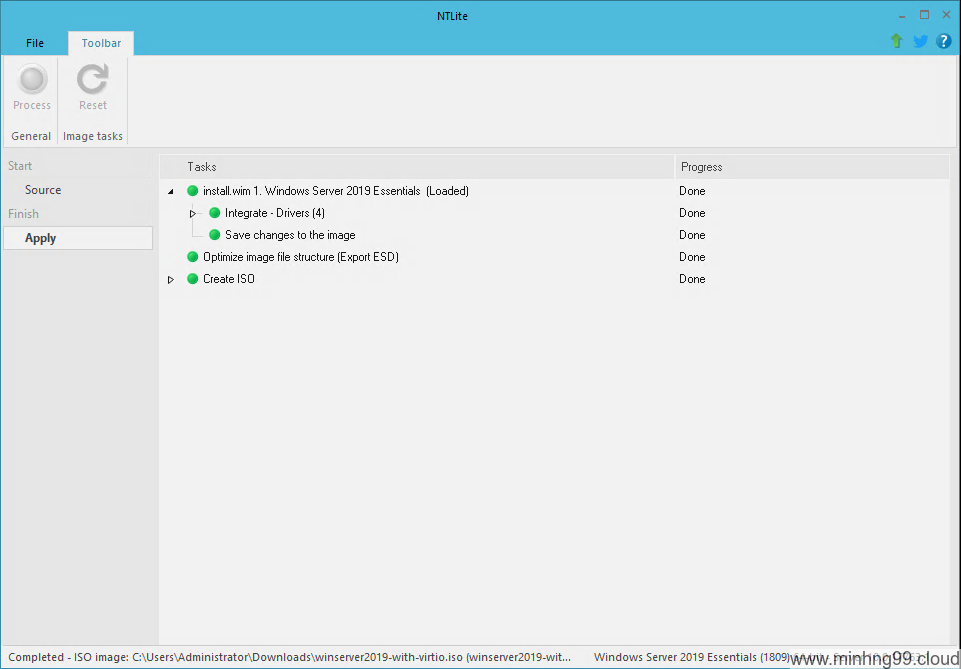
This could take a pretty long time to finish so just wait patiently and hopefully it will succeed in the end.
2. Create a shared folder of the Windows Installation ISO
Now I’m assuming that you’ve succeeded in integrating the drivers into the Installation ISO? Good, now you’ll need to create a Shared folder on another Windows machine, you could use Samba to create a shared folder on Linux if you don’t have another Windows machine laying around but since I already have a Windows machine here so I’ll just use it.
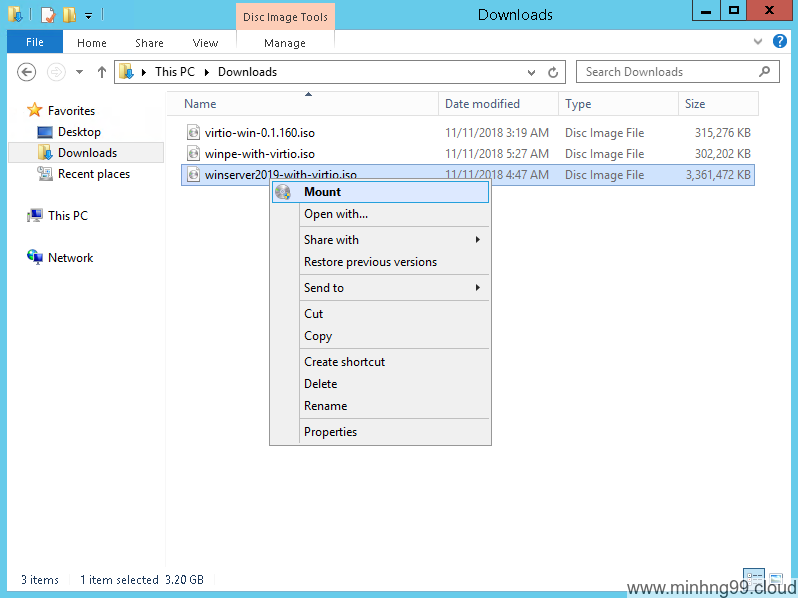
If you did not use Create ISO with NTLite, it will save the driver integrated setup into the Image directory which you’ve selected earlier, you could directly use it without any issue (the Image directory is C:\winiso-extract in my case) but here since I’ve created a new ISO so I’m gonna to mount it and serve the mounted drive as a Shared folder
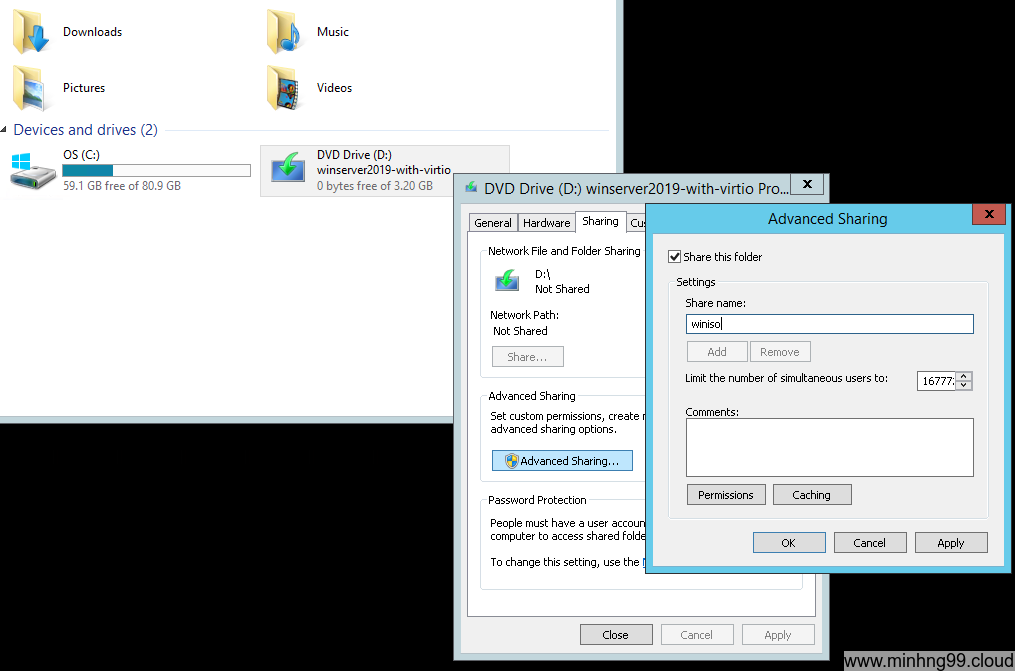
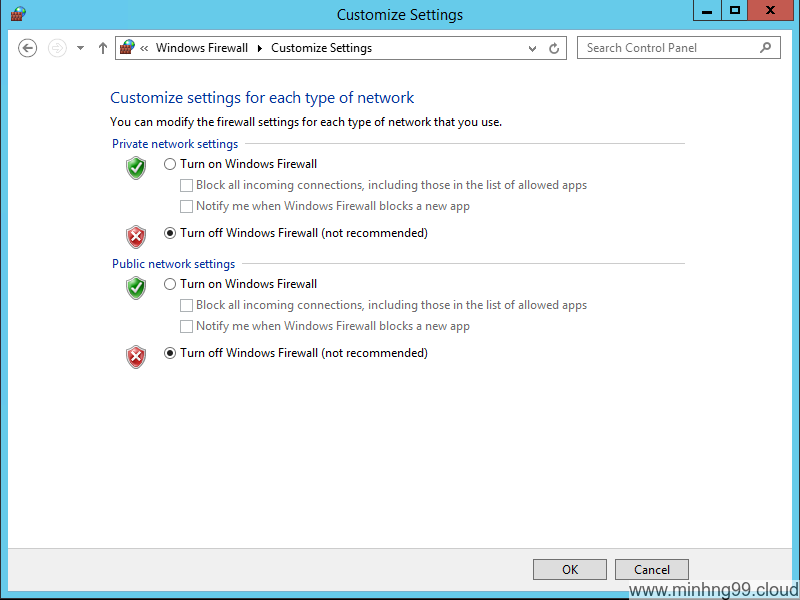
You’ll need to Disable Windows Firewall for reaching the Shared folder from outside the internet (which is what the targeted installation machine will do).
3. Obtaining WinPE ISO
WinPE ISO is a very “mini” version of Windows which can run on RAM, you’ll need to install a big Windows Assessment and Deployment Kit (ADK) which is around 1.5GB just to create a 300MB ISO file which is ridiculous, I’ll attach the WinPE ISO file with the VirtIO driver integrated here for easier for you to use it.
But here’s the related docs if you curious on how to get the ISO file: https://docs.microsoft.com/en-us/windows-hardware/manufacture/desktop/download-winpe–windows-pe
You also could use NTLite to add VirtIO driver to WinPE.
Download my WinPE ISO integrated with VirtIO driver: winpe-with-virtio.iso
4. Configure GRUB to boot WinPE on Linux server
The Linux OS I’m using is Ubuntu 18.04, other OS might involve different steps to generate new grub config file.
First of, login to your Linux server using SSH using root.
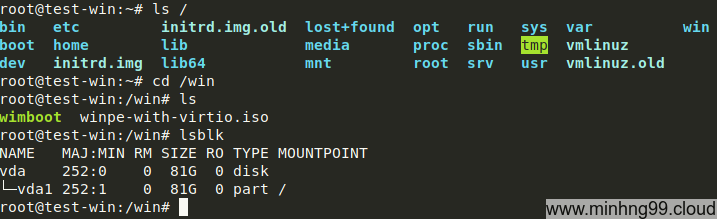
Create a new dir called win in / by executing command:
mkdir /win
Download wimboot into the directory by using the command:
wget https://www.minhng99.cloud/assets/files/wimboot -O /win/wimboot
Download and copy the winpe-with-virtio.iso into /win/winpe-with-virtio.iso also
Now be careful with the partitions here, on my server there’s only 1 disk and 1 partition (your server might be different), and my / is located on disk 0 partition 1, if your grub bootloader is located on another partition then it will need a little bit of modification for it to work… I’ll tell you how to deal with different partition scheme later.
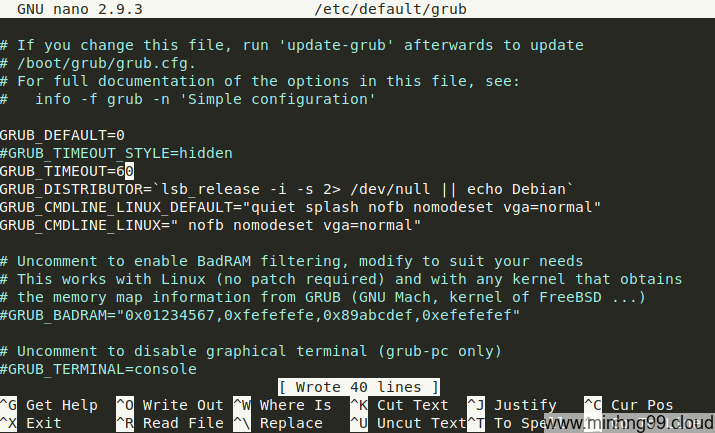
Now edit the file /etc/default/grub to comment out (or delete) the line GRUB_TIMEOUT_STYLE=hidden as above.
Some other grub version might use GRUB_HIDDEN_TIMEOUT_QUIET=true, comment out (or delete) that line also.
nano /etc/default/grub
Use Ctrl+O to save and Ctrl+X to exit.
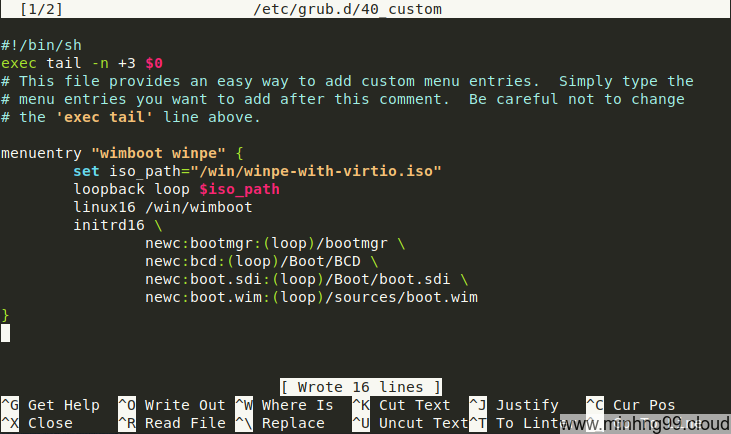
Now use edit the file /etc/grub.d/40_custom and add the following code at the end of that file
menuentry "wimboot winpe" {
        set iso_path="/win/winpe-with-virtio.iso"
        loopback loop $iso_path
        linux16 /win/wimboot
        initrd16 \
                newc:bootmgr:(loop)/bootmgr \
                newc:bcd:(loop)/Boot/BCD \
                newc:boot.sdi:(loop)/Boot/boot.sdi \
                newc:boot.wim:(loop)/sources/boot.wim
}
Remember I said something with the partitioning? If your / is not located on the same disk and partition as grub, you will have to do a little modification to the set iso_path="/win/winpe-with-virtio.iso" for pointing grub to the proper disk/partition by change it to set iso_path="(hd0,1)/win/winpe-with-virtio.iso" here hd0,1 means the ISO file is located on the disk 0 and partition 1, change those number as your partition scheme, also - there’s no partition 0, the first partition is 1.
You need to modify the linux16 /win/wimboot to point it to the correct partition also.
If your partition scheme is the same as mine then you can just copy and paste it in place.
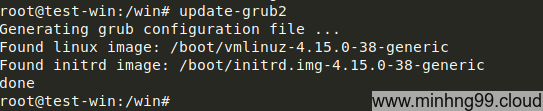
Now run update-grub2 to generate new grub config file.
5. Installs Windows by using WinPE
Now you have to access the VNC/KVM/IPMI of the Linux VPS you wanted to install Windows on it, this is a special feature and it’s available on most of hosting services which allow you to control the VPS/server even the network is down/system crash/kernel panic…, it works by capture the screen output from the machine and send it to you meanwhile capture your input and send it to the machine just like you are in front of it and access it physically.
If you don’t have access to such feature then you will not be able to do setup.. at least with the method of this tutorial which involves manual setup
Open the VNC from the VPS’s control panel, type reboot in the SSH and you would see something like this
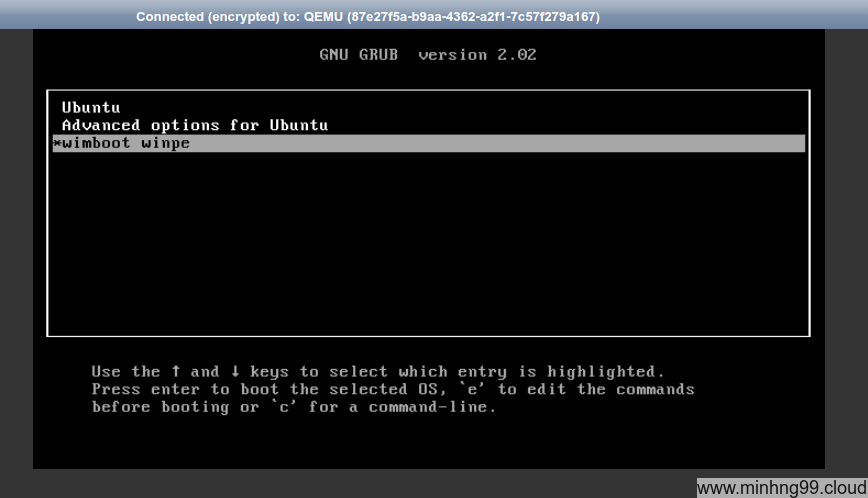
Use your [arrow keys] and select the wimboot winpe and [Enter]
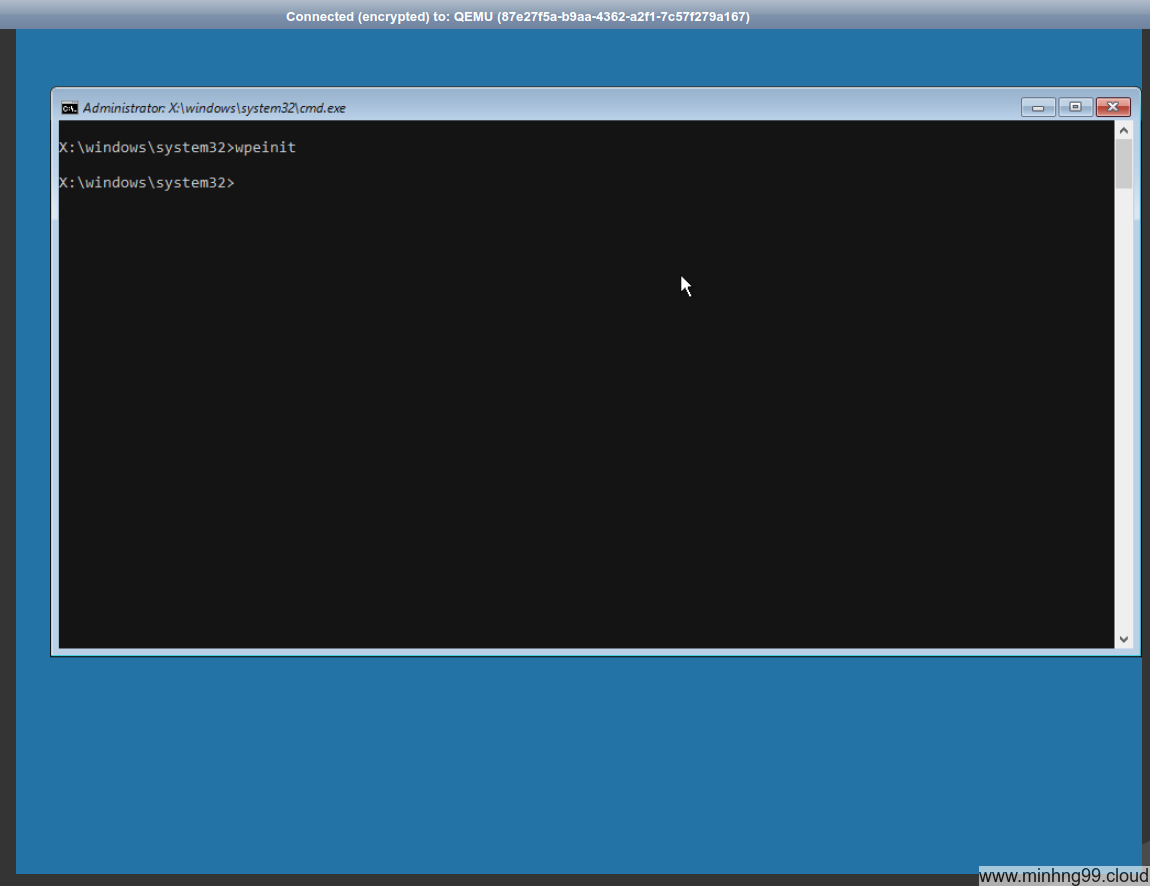
Now the WinPE is booted and you would see something like this, it’s fine, don’t panic. Now check the internet accessibility by pinging a known working IP address like 1.1.1.1 or 8.8.8.8
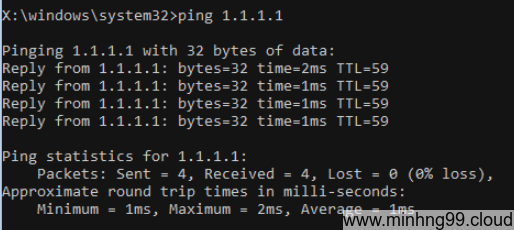
If you see it reply then good, internet access is working and you may proceed to the next step, if the network is not working (request timed out or something else showing) then there might be error in somewhere, it could be your VPS provider doesn’t allow DHCP and you have to set the IP by using the command line, or it could be the network device not being recognized. You will have to diagnose this yourself, sorry.
Now do you remember the Shared directory we’ve created on step 2? You need it now.
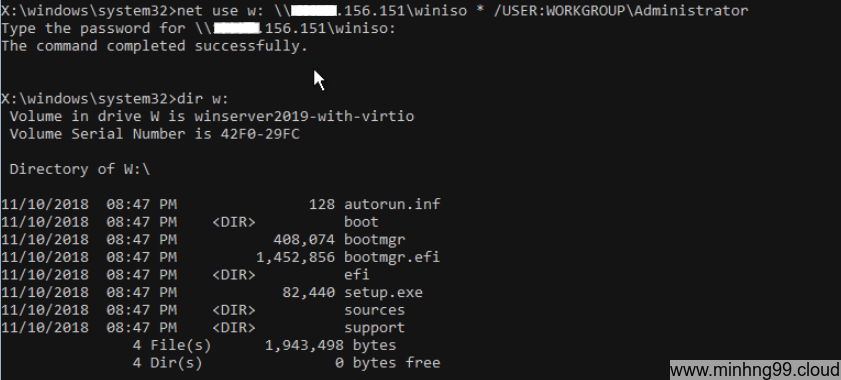
Mount the Shared directory which is the contents of the Windows Setup to drive w:
net use w: \\YOUR_SHARED_SERVER_IP\winiso * /USER:WORKGROUP\YOUR_SHARED_DIRECTORY_USERNAME
Type the password for YOUR_SHARED_DIRECTORY_USERNAME then [Enter], if it say successfully as above then it’s good to go, otherwise you have to check the step 2 again.
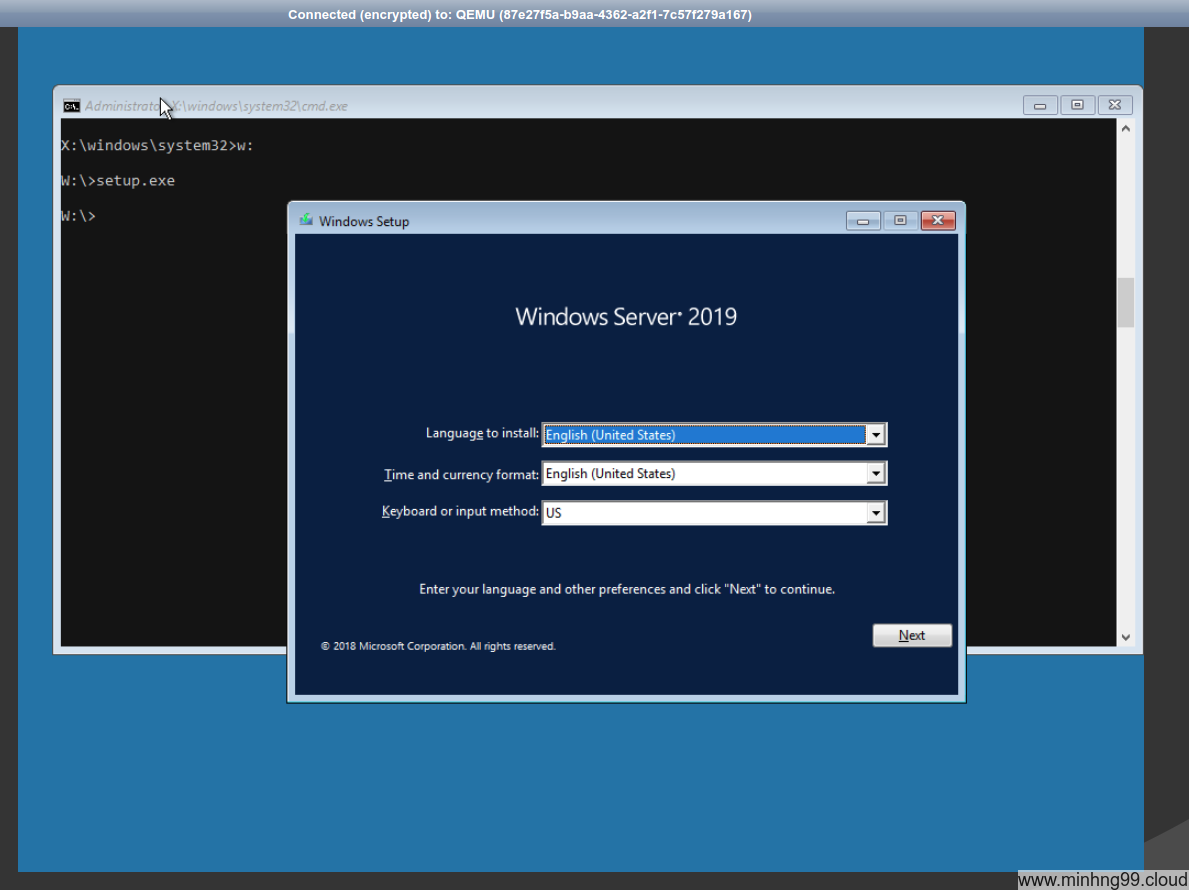
Now navigate to the Windows Setup drive which is w: by typing
w:
and then run the setup with
setup.exe
and proceed the installation process as you would do on a normal Windows Setup
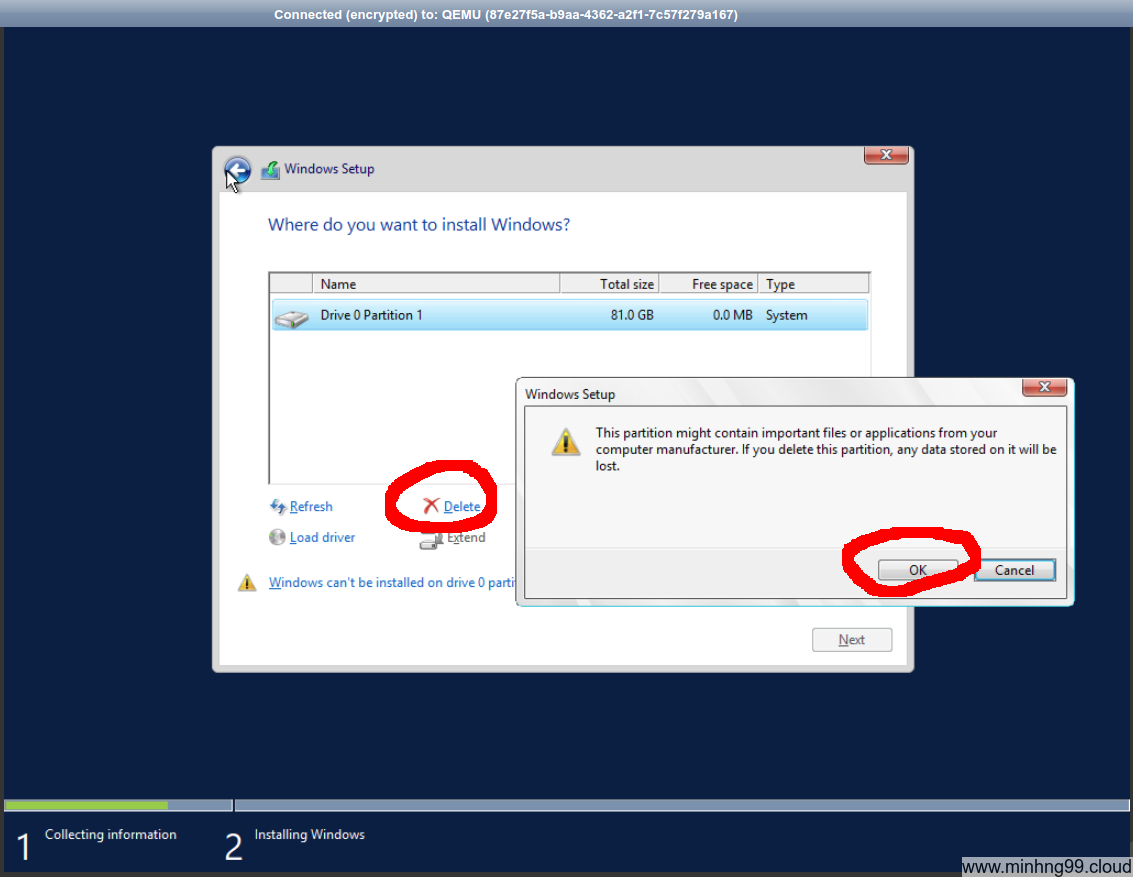
As for this step, select Delete for deleting the Linux OS’s partition !! YOU WILL LOSE ALL OF YOUR LINUX OS’S DATA !! and select Next or you could create the partition as you’d like.
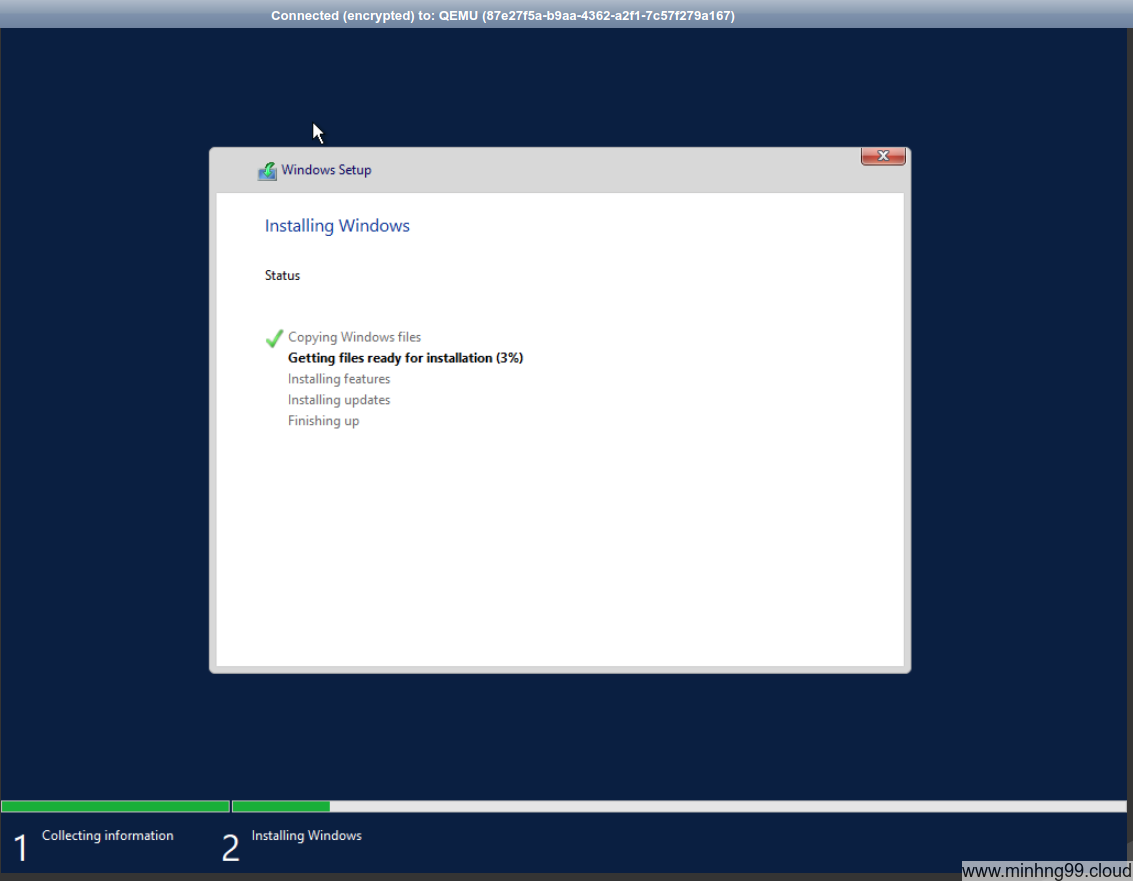
Now it’s time to wait and hope that everything will be OK, the speed of this highly depends on your Linux server’s Download speed and the Shared server’s Upload speed (whichever is the slowest)
Unfortunately… Windows Server 2019 somehow bugged and results in BSoD when the installation successful so I’ve redone it with Windows Server 2016, it’s basically the same.
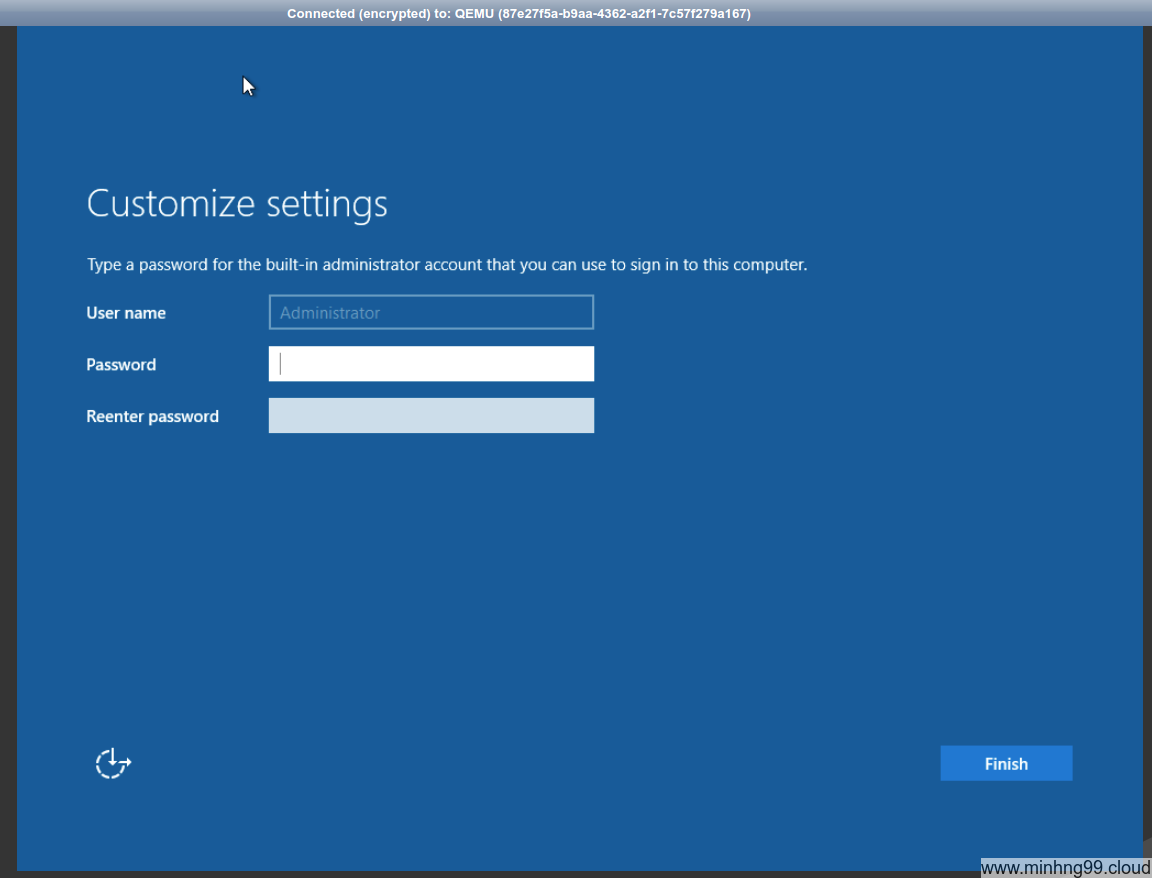
Woohoo, we got to this welcome screen now, just set things up yourself.
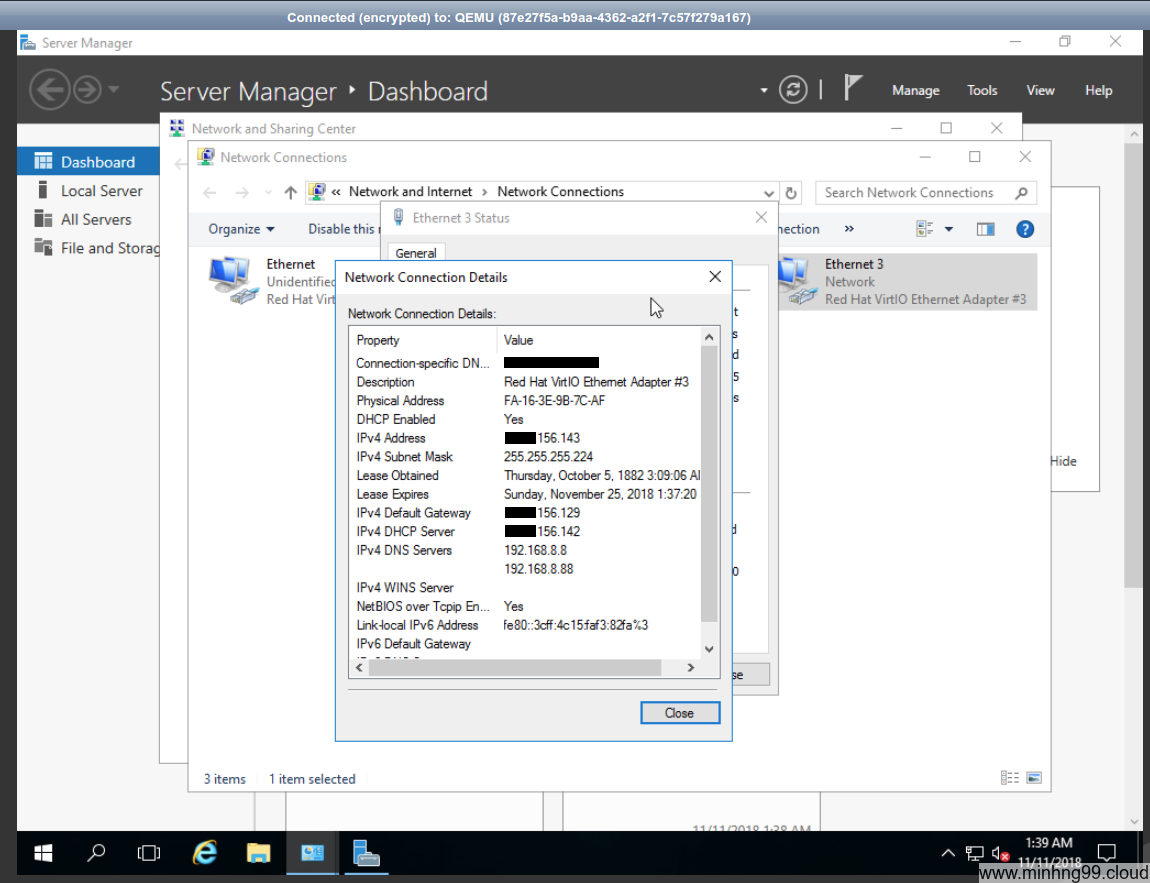
As we can see, the network device is recognized and working properly.
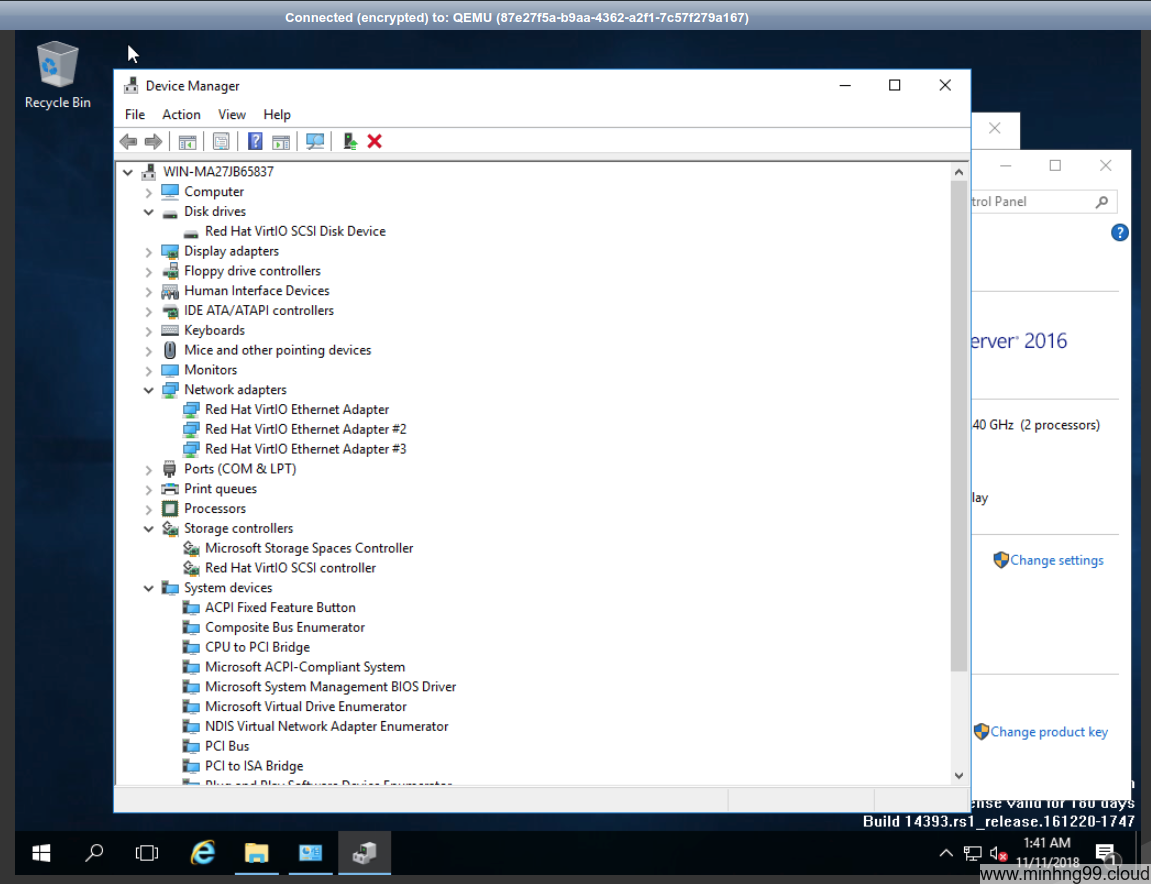
Also, there are no missing drivers.
Now you just have to enable RDP or install TeamViewer or just… use VNC as is for remoting your server. With this tutorial, you can install Windows Server yourself on hosting providers which are not supported it or charging you ridiculous amount of “license fees”, but I don’t think that they’ll happy to see you’re running Windows Server without their permission :)